How To Make A Colonial Knot
The knot that I'm using to stitch the spirals in the 6"quilts for the "...and still counting" project is the Colonial knot. I prefer the Colonial over the French knot because it is more stable. Plus, it's fun to make. It's been taught it to everyone who I've lured into contributing to this project. My cousin-in-law, Judy, demonstrated the step-by-step technique for these photos this weekend just minutes after she had learned how to make them.
 Pull the 2-ply strand of floss to the surface where the knot is to be placed. Lay the needle on top of the floss to make an "X". Note that the needle is pointed away from you.
 Dip the point of the needle under the floss.
 Wrap the floss over the top of the needle.
  Insert the floss wrapped needle into the fabric about a threads width from where the knot began.
 Pull the length of floss to tighten the knot around the shaft of the needle and snug it against the fabric.
 Pull the floss through to the back of the fabric to complete the knot.
 You have just made a figure eight with the floss around the needle to make the Colonial Knot.
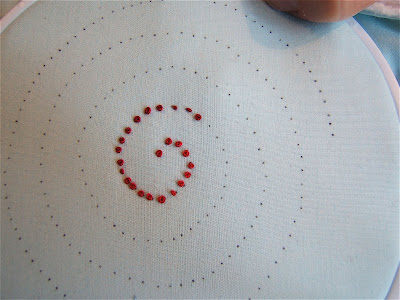 The Colonial Knot is used for Candle Wicking stitchery. The size of the knot is determined by the thickness of the thread and the size of the needle. These were made with 2-ply strand of floss and size 7 needle.


 Fabric Bird Sculpture Pattern


3 comments:
Thanks for the tutorial. I know almost nothing about embroidery so every bit helps. This knot might be nice on some of my smaller animals instead of google eyes.
Gee, and I always thought this was a French knot. What would my grandmother say about my ignorance? tsk. Thanks for the info!
i always wondered about the difference in the knots, but never went far enough to find out. thanks, i love that these are more stable and i want to try them with heavy string or something like that....so they come out like pompoms!
Post a Comment